This guide covers everything from calculating your actual heat load to selecting and positioning the right system, comparing heating methods side by side, and troubleshooting the problems that trip up even experienced growers.
Key Takeaways
- Supplemental heat becomes necessary when outdoor temps threaten to fall below your crop's minimum threshold — 45°F–50°F for most tender plants, 65°F for cucumbers.
- Effective heating starts with a BTU load calculation, not a square footage guess.
- Sealing air leaks before installing any heater is the highest-ROI step available.
- Ceiling-mounted low-intensity infrared tube heaters are the preferred choice for large commercial greenhouses — even heat at the canopy, no drafts.
- Thermostat sensor placement and air circulation directly determine heating performance — and most growers get both wrong.
When Does a Greenhouse Need Supplemental Heating?
Not every greenhouse needs a dedicated heater. Passive solar gain, thermal mass, and tight construction can carry some structures through mild winters — but supplemental heat becomes necessary when nighttime temperatures regularly drop below your crop's minimum tolerance.
Crop minimum temperature benchmarks:
| Crop | Production Minimum | Chilling Risk Begins |
|---|---|---|
| Cucumbers | 65°F | Below 50°F |
| Tomatoes (night) | 59–68°F optimal | Below 50°F |
| Sweet peppers | ~57°F (reproductive damage) | Below 57°F |
| Tropical foliage | ~50°F | 46–54°F |
| Lettuce / spinach | 46–72°F range | Occasional frost tolerated |
Source: University of Florida IFAS, USDA, and Alberta Agriculture crop production guides
Supplemental heating is required in four scenarios:
- Extended freezing forecasts in northern climates
- Crops with high minimum temperature requirements (cucumbers, tropical ornamentals)
- Year-round commercial production where consistency matters
- Single-pane glass structures that shed heat rapidly overnight
Glazing type matters more than most growers expect. Single-pane glass carries a U-value of 1.1 Btu/hr·ft²·°F, while 8–16mm triple-wall polycarbonate sits at 0.42–0.53. The same outdoor temperature can demand dramatically different heating output depending on your greenhouse's construction.
How to Heat a Greenhouse: Step-by-Step
Step 1: Calculate Your BTU Load
Effective heating starts with math, not guesswork. The standard transmission heat loss formula is:
Q (transmission) = Surface Area × U-value × ΔT
Where ΔT is the difference between your desired indoor minimum and the expected outdoor low.
You also need to account for infiltration:
Q (infiltration) = 0.02 × Volume × Air Changes per Hour × ΔT
Air change rates vary significantly by structure condition — NGMA design guidance puts the range at 0.25–0.70 ACH for double-film structures up to 2–4 ACH for very old glass. Your total design load is transmission plus infiltration combined, and your heater output should meet or exceed that number.
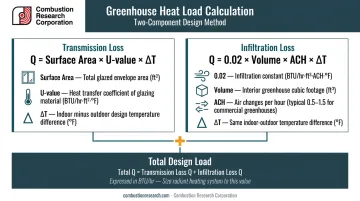
Undersizing means crop loss during cold snaps. Oversizing wastes energy and causes short-cycling. Size to your actual calculated load — not to a round number that feels safe.
Step 2: Seal Air Leaks First
Before buying any equipment, reduce what you need to heat. California greenhouse energy guidance attributes 10%–20% of total greenhouse heat loss to leakage around doors, fans, vents, and frame joints.
Seal these first:
- Door perimeter seals and threshold gaps
- Vent damper edges and glazing frame joints
- Any cracked or loose panels in the glazing
- Interior sidewalls with horticultural bubble wrap (reduces sidewall heat loss at low cost)
Thermal curtains are worth adding for nighttime use. A 2023 study of glass Venlo structures found they reduced nighttime heat loss by an average of 21%, with some installations reaching 26%.
Step 3: Select and Position Your Heating System
Heater selection should follow directly from your BTU load calculation. The key decision variables are:
- BTU output required (from Step 1)
- Fuel type available — natural gas, propane, or electricity
- Crop sensitivity — draft-sensitive crops need careful airflow consideration
- Structure size and ceiling height
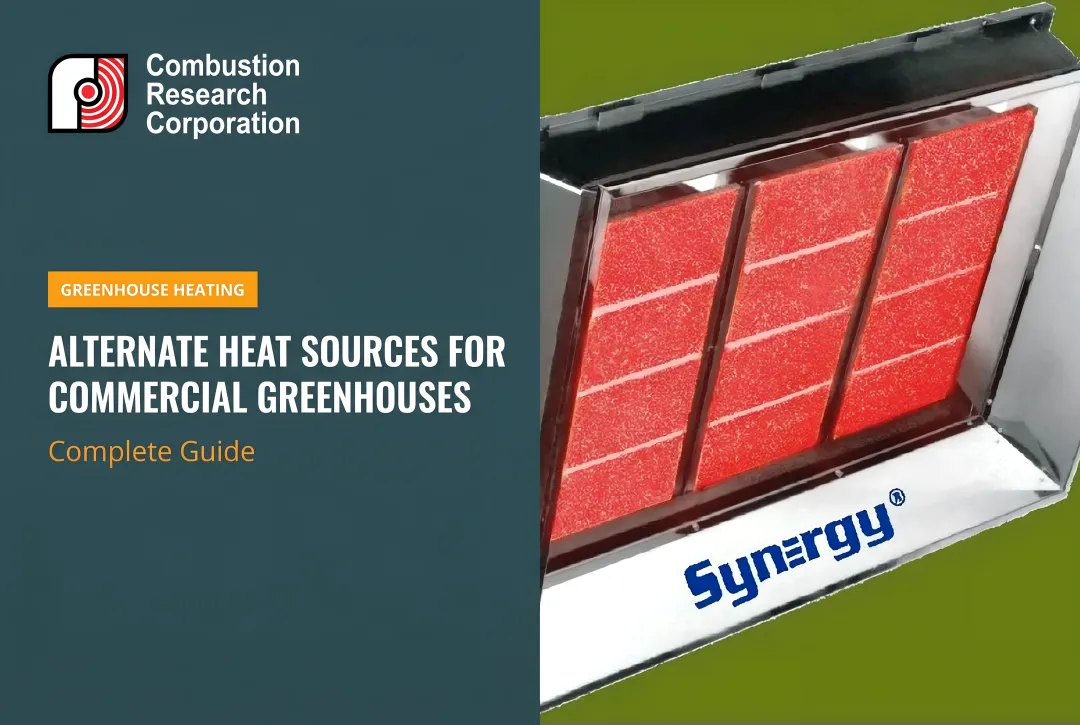
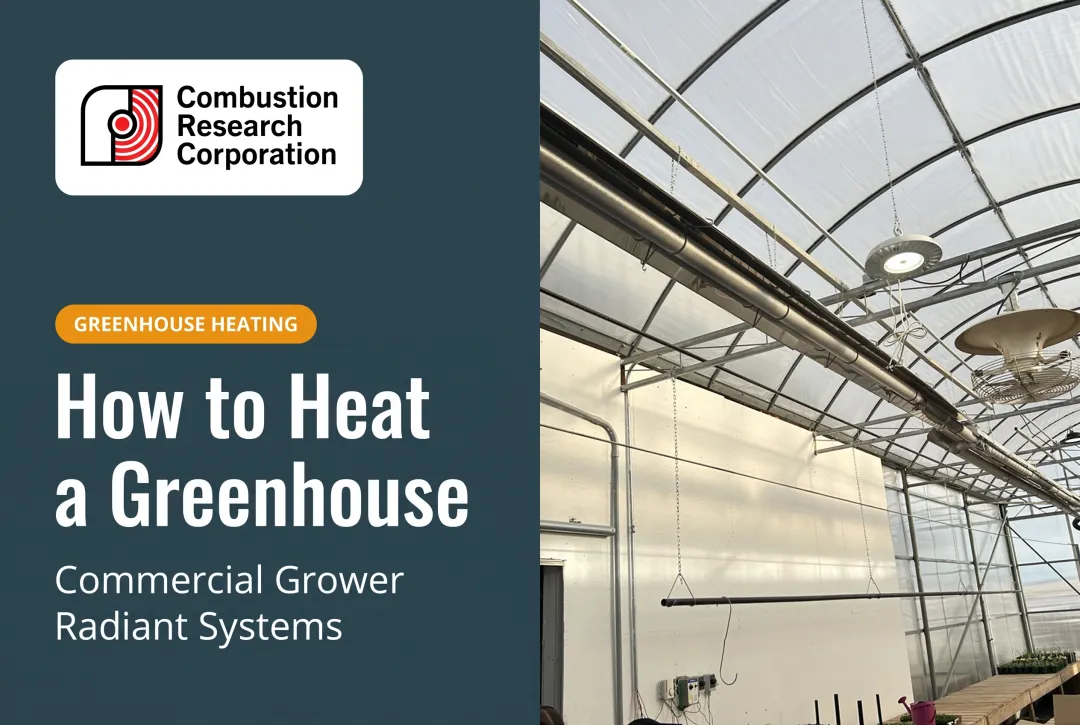
For large or commercial greenhouses, ceiling-mounted low-intensity infrared tube heaters are the strongest choice. They warm plants and surfaces directly through radiant energy rather than heating the air column first — meaning less heat lost to stratification and less energy wasted heating dead air near the roof. Virginia Tech research documents fuel-cost savings of up to 30% versus forced-air unit heaters.
Two CRC product lines are well-matched to commercial greenhouse conditions:
- Reflect-O-Ray EDS series (40,000–250,000 BTU/hr) — custom-engineered for large or complex layouts; available in stainless steel and powder-coated finishes to handle high-humidity, corrosive environments; runs on natural gas, propane, or oil (for off-grid facilities without gas access)
- Omega II (40,000–200,000 BTU/hr) — power-vented, pre-engineered for high-production bays with repeating zone layouts; available in stainless steel and powder-coated configurations
One important placement note: ceiling-mounted systems distribute heat more evenly across large floor areas. Portable or single-point units create warm and cold zones that lead to uneven plant development.
Step 4: Install Thermostat Controls and Monitor Performance
A well-calibrated thermostat with a remote sensor placed at plant canopy level in the center of the greenhouse is the control reference point that matters. Placing the sensor near the heater causes the system to cycle off before plants are actually warm. Placing it near an exterior wall causes over-heating.
Once the sensor is correctly placed, thermostat type becomes the next lever. Two-stage or modulating thermostats paired with dual-input heaters — such as CRC's Reflect-O-Ray DI or Omega II 9K Series — provide high-fire/low-fire operation that improves temperature stability and cuts energy consumption. Both lines use standard 24V thermostat hookup, so integration with commercial control systems is straightforward.
After installation, monitor and log temperatures daily for the first two to three weeks. Look for cold pockets at floor level, temperature stratification between canopy and ceiling, and zones that lag behind the rest of the structure. Adjust heater positioning or thermostat setpoints accordingly.
Greenhouse Heating Methods: Comparing Your Options
Five primary heating approaches exist for greenhouses, and the right choice depends on your structure's size, fuel access, crop sensitivity, and capital budget. Each involves genuine trade-offs.
| Method | Best Scale | Fuel | Key Advantage |
|---|---|---|---|
| Infrared Tube Heaters (Gas) | Large commercial | Natural gas / propane | Heats plants, not air |
| Forced-Air Gas/Propane | Mid-size | Natural gas / propane | Fast temperature recovery |
| Electric Heaters | Small / hobby | Electric | No venting required |
| Passive Methods | Any (supplemental) | None | Zero operating cost |
| Hydronic Radiant | Large commercial | Natural gas / other | Root-zone efficiency |
Infrared Tube Heaters (Gas-Fired)
Low-intensity infrared tube heaters use radiant energy to warm objects, plants, and surfaces directly rather than heating the air volume first. The practical result: heat is felt at plant level even when ambient air temperature is somewhat lower, which reduces the energy wasted warming dead air near the roof.
CRC's greenhouse-recommended lines — Reflect-O-Ray EDS and Omega II — operate with fully enclosed combustion, exhausting gases externally through dedicated venting. The Reflect-O-Ray's vacuum (negative-pressure) design is particularly well-suited to enclosed growing environments: if any tube connection loosens, the system draws ambient air inward rather than pushing exhaust gases into the crop space. This is a meaningful safety distinction from positive-pressure systems.
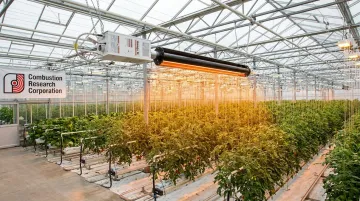
Best for: Large commercial and semi-commercial greenhouses with high ceilings and high heat loss.
Forced-Air Gas or Propane Heaters
Forced-air unit heaters heat the air volume inside the greenhouse and rely on convection and fan distribution. They offer fast temperature recovery and wide availability, and work reliably in mid-size structures. The trade-off is airflow: fans can stress sensitive plants and create hot/cold zones if units are poorly positioned. Air heating generally increases vapor-pressure deficit (VPD) compared to radiant systems, which requires closer humidity monitoring to prevent crop stress.
Best for: Mid-size greenhouses with hardy crops or operators who need fast system recovery.
Electric Heaters
Electric infrared and fan-forced electric heaters are clean, require no venting, and are easy to install. Operating costs at scale are typically higher than gas-fired alternatives — exact comparisons depend on local electricity and gas rates — limiting their practicality for large commercial operations.
Works best in: Small hobby greenhouses, mild climates, or situations where gas infrastructure doesn't exist and a small BTU load makes electric costs manageable.
Passive Methods (Thermal Mass, Hotbeds)
Water barrel thermal mass, hotbeds using decomposing organic material, and south-facing orientation all reduce reliance on active heating. These are genuine tools — but they are supplementary. In climates with sustained hard freezes, passive strategies alone are insufficient to maintain minimum crop temperatures.
Best for: Shoulder seasons, supplemental heat retention alongside an active system.
Hydronic (Hot Water) Radiant Systems
Under-bench or in-floor hot water pipe systems heat the root zone directly rather than the full air volume. Extension research shows root-zone heating can permit greenhouse air temperatures 5–15°F lower than conventional systems, and can supply 25%–75% of total heat depending on climate. They pair well with natural gas boilers and are common in larger commercial operations.
Ideal use case: Large commercial operations with bench or container crops and the capital budget for a boiler system.
Key Parameters That Affect Greenhouse Heating Performance
Even with the right system installed, these four variables will determine whether that system actually performs.
Glazing and Insulation Value
The glazing material directly sets the rate at which heat escapes. Here's how common materials compare:
| Glazing Material | U-value (Btu/hr·ft²·°F) | Approximate R-value |
|---|---|---|
| Single-pane glass | 1.1 | 0.91 |
| Double-pane glass | 0.7 | 1.43 |
| 6–10mm twin-wall polycarbonate | 0.53–0.63 | 1.59–1.89 |
| 8–16mm triple-wall polycarbonate | 0.42–0.53 | 1.89–2.38 |
| Single-layer polyethylene film | 1.2 | 0.83 |
| Inflated double polyethylene | 0.7 | 1.43 |
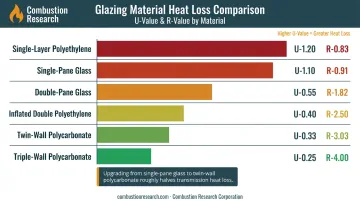
Source: Farm Energy Extension — Reducing Greenhouse Energy Consumption
Upgrading from single-pane glass to double-wall polycarbonate roughly halves your transmission heat loss. That directly reduces the size of heater you need and the fuel it burns every night.
Thermostat Placement and Setpoints
Sensor location determines what the system responds to. Two practical rules:
- Place the sensor at canopy level in the center of the greenhouse — away from heaters, exterior walls, and vents
- Use dual day/night setpoints — most crops tolerate cooler nights as long as temperatures stay above their minimum threshold, and dropping the nighttime setpoint by even a few degrees noticeably cuts fuel consumption
Ventilation and Air Circulation
Without air movement, heat stratifies at the ceiling while plants sit in cooler air at floor level. Horizontal airflow (HAF) fans break up this stratification. Two sizing targets from UConn and UMass extension guidance:
- Fan capacity: 2 CFM per square foot of greenhouse floor
- Air velocity: 50–100 ft/min at canopy level
Ventilation also needs to be balanced against heat retention. Too much air exchange in cold weather wastes heating energy; too little causes humidity buildup that promotes fungal disease.
Heater Sizing Relative to Structure
Once airflow is dialed in, the heater itself has to be sized to match the structure. An undersized unit runs continuously and still falls short on the coldest nights; an oversized unit short-cycles and heats unevenly. Correct sizing comes from the BTU load calculation in Step 1, with a 10–15% buffer added for extreme cold events.
CRC's engineering team provides custom heat loss calculations for greenhouse projects — a worthwhile step before finalizing any system specification. You can reach them at 888-852-3611 or find a local representative at combustionresearch.com/find-a-rep.
Common Mistakes and Troubleshooting Tips
Common Mistakes
- Sizing by square footage alone — ignoring ceiling height, glazing type, and local climate almost always produces an undersized system that fails during cold snaps
- Placing the thermostat sensor near the heater, a door, or an exterior wall — causes inaccurate readings and either over-cycling or under-heating at plant level
- Skipping air sealing — a well-sized heater will still underperform if cold air infiltrates freely through gaps in the structure
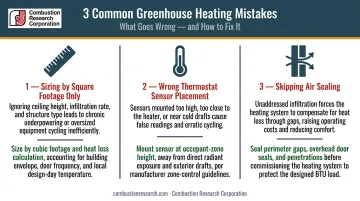
If your system is already running and something feels off, these are the most common problems and where to start.
Troubleshooting Guide
Uneven temperatures — warm near heater, cold at the far end:
- Likely cause: Insufficient air circulation or single-point heat distribution
- Check whether HAF fans are operational and correctly positioned; consider adding a supplemental heat source in the cold zone
Heater runs constantly but can't reach temperature target:
- Likely cause: Undersized system or significant undetected air leaks
- Inspect for air leaks at door seals, glazing edges, and vent dampers — then recalculate BTU load and compare against the heater's rated output
Temperature readings are inaccurate or erratic:
- If the sensor is near a heat source, exterior wall, or door, it's reading the wrong air mass — not your plants' environment. Relocate it to canopy level at the greenhouse center and verify calibration against a second thermometer.
Frequently Asked Questions
How cold is too cold for a greenhouse?
Most tender plants begin suffering damage below 45°F, while hard freezes below 32°F are lethal to non-cold-hardy crops. The correct minimum depends entirely on what you're growing — cucumbers need no less than 65°F, while lettuce can tolerate occasional frost. Size your heating system to maintain your most temperature-sensitive crop's minimum on the coldest expected night.
What is the cheapest way to heat a greenhouse in winter?
Passive methods — thermal mass, tight insulation, south-facing orientation — carry the lowest operating cost but rarely suffice alone in cold climates. For active heating, gas-fired infrared heaters offer the lowest long-term fuel cost for larger structures, while electric heaters cost less upfront but more to run at scale.
How do I calculate how much heat my greenhouse needs?
Use these three steps:
- Multiply your total glazed surface area by the glazing's U-value and the temperature differential (indoor minimum minus outdoor low).
- Add an infiltration load based on your structure's air change rate.
- Match the combined BTU result to a heater's rated output, adding a buffer for extreme cold nights.
Is infrared or forced-air heating better for a greenhouse?
Infrared is generally preferred for larger greenhouses — it warms plants and surfaces directly, maintains humidity stability, and costs less to operate. Forced-air systems recover temperature faster after ventilation but can stress sensitive crops and require careful placement to avoid cold zones.
How do I keep my greenhouse warm at night?
Maximize nighttime heat retention by:
- Adding thermal mass — water barrels or stone floors absorb daytime heat and release it overnight
- Sealing air leaks thoroughly throughout the structure
- Hanging insulating curtains or bubble wrap on interior glazing surfaces
- Setting the thermostat's nighttime setpoint to your crop's minimum safe temperature, not the daytime target
Do greenhouse heaters require ventilation?
Electric heaters do not require venting. Gas-fired heaters — natural gas or propane — require proper flue connections to exhaust combustion gases safely outside the structure. Unvented gas heaters pose risks from carbon monoxide and ethylene, which can damage or kill plants at concentrations as low as 0.01 ppm. CRC's Reflect-O-Ray vacuum systems and Omega II power-vented systems both vent entirely to the exterior, with the vacuum design providing an added safety margin in enclosed growing environments.